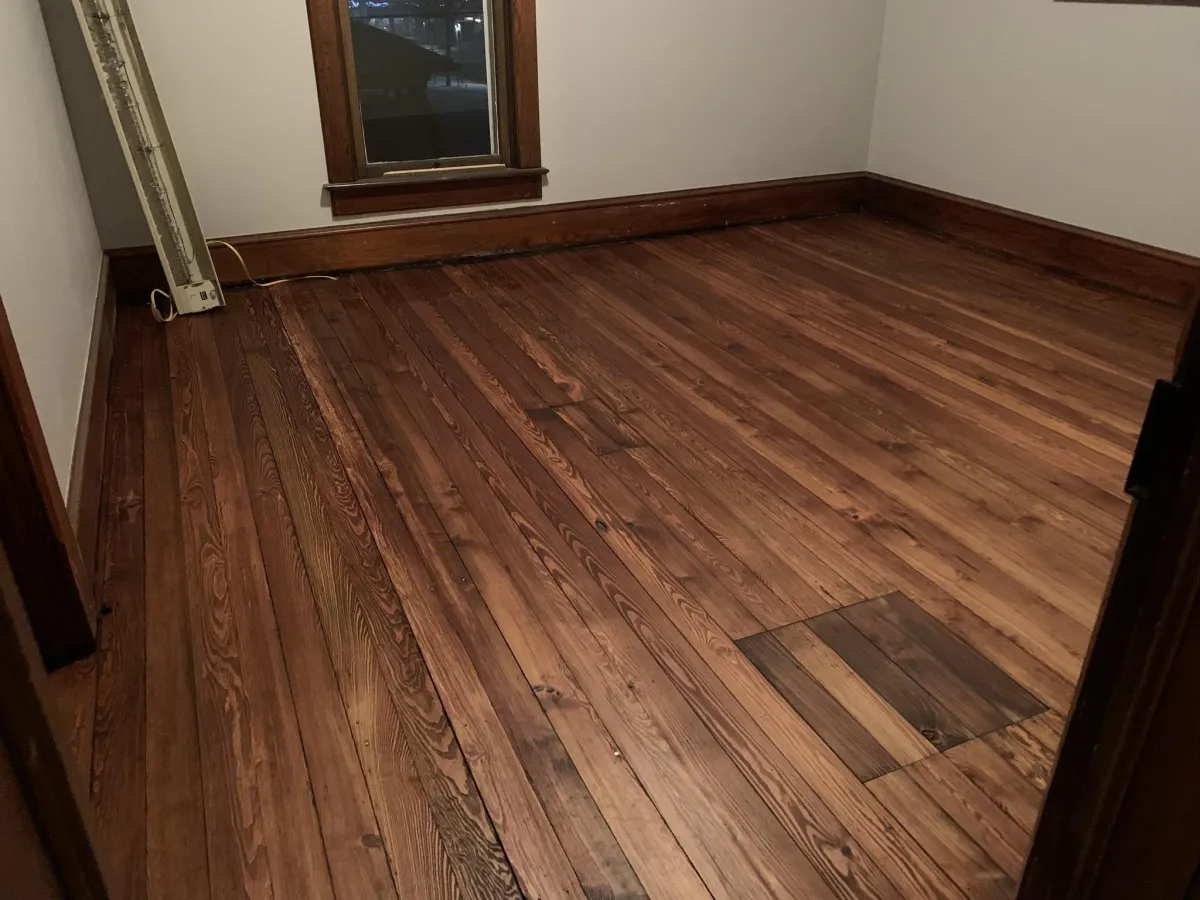
How To Install Vinyl Plank Flooring
Whether you're an experienced DIYer or a beginner, this guide will walk you through every step to install vinyl plank flooring with a flawless, professional finish. From preparing the subfloor to making precise cuts and securing the planks, you'll learn the essential techniques to achieve a smooth and durable result. With the right tools and careful attention to detail, you can transform your space with beautifully installed vinyl plank flooring that looks expertly done.
Key Summary
Before installation, allow the vinyl planks to acclimate in the room for at least 48 hours to adjust to temperature and humidity levels. Next, select the best installation method for your flooring type: Grip-Strip (peel-and-stick), Click-Lock (interlocking planks), or Glue-Down for a permanent hold.
When planning your layout, choose a pattern that complements your space—common options include straight lay, diagonal, herringbone, chevron, or parquet. For precise cuts around obstacles like door frames or vents, use a utility knife, jigsaw, or oscillating multi-tool to ensure a clean fit.
Finally, install transition strips at doorways and between different flooring surfaces, maintaining a ¼-inch expansion gap between the planks and the transition strip to allow for natural movement. This ensures a professional, long-lasting finish.
In this article we'll cover:
Everything You’ll Need
Prepare the Space
Pick a Pattern or Design
Choose an Installation Method
Lay the First Row
Cutting Planks to Fit
Laying Subsequent Rows
Finishing the Installation
Looking For a Pro Vinyl Flooring Installer?
Summary of Vinyl Flooring Installation Steps:
Common Things to Avoid
Tips for a Successful Installation
Frequently Asked Questions
Conclusion
Posts navigation
Prepare the Space
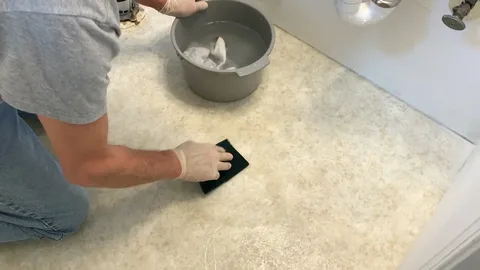
Remove Baseboards and Old Flooring
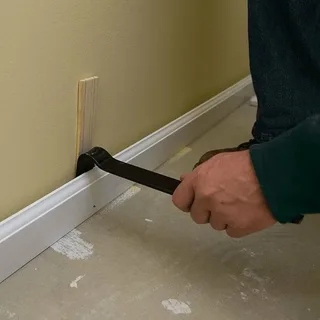
The first crucial step in installing vinyl plank flooring is preparing your space by removing all existing baseboards and old flooring. This creates a clean, level surface for your new floor.
Start by carefully prying off baseboards using a pry bar, taking care to avoid damaging the walls. If you're removing carpet, slice it into manageable strips with a utility knife before rolling it up and disposing of it. For other flooring types like hardwood, tile, or laminate, follow the appropriate removal process to ensure complete clearance.
Proper preparation at this stage helps prevent uneven surfaces and ensures a smooth, professional-looking vinyl plank installation.
Clean the Subfloor and Fill Any Cracks or Uneven Areas
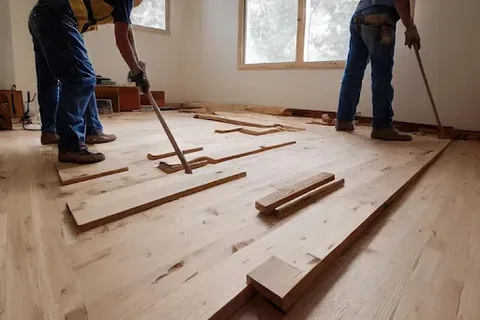
Begin by thoroughly sweeping and vacuuming the subfloor to eliminate all dust, dirt, and debris. Carefully inspect the entire surface for any cracks, dips, or uneven areas that could affect your flooring's performance.
For optimal results, apply a leveling compound to fill any gaps or low spots, ensuring a perfectly flat base. If you encounter any raised areas, lightly sand them down until the surface is uniformly smooth. Taking these steps will guarantee a flawless foundation for your vinyl plank flooring, preventing future issues and ensuring a professional-quality installation.
Remember: A properly prepared subfloor is critical for achieving both the look and longevity of your new floors.
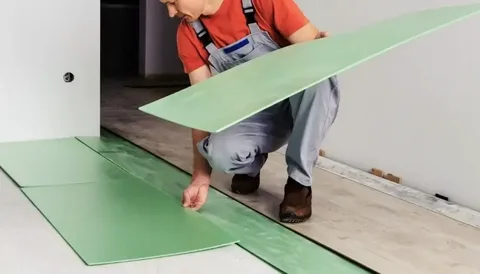
While not always required, adding an underlayment beneath your vinyl planks offers valuable benefits – improved underfoot comfort and enhanced sound absorption for a quieter walking experience.
To install: Simply roll out the underlayment across your prepared subfloor, trimming as needed. Secure the seams with high-quality adhesive tape, maintaining tight butt joints without overlaps or gaps. This extra layer creates an ideal foundation that helps your vinyl flooring perform at its best while adding that premium feel underfoot.
Pick a Pattern or Design
Unlock the design potential of your floors with versatile vinyl plank installation patterns. These creative layouts let you customize your space with everything from timeless classics to modern statements, perfectly aligning with your interior style.
Discover how strategic pattern choices can:
Elevate ordinary floors into design focal points
Visually expand or define spaces
Complement your existing décor scheme
Popular installation patterns include:
• Straight lay (parallel to walls)
• Diagonal (45-degree angle)
• Herringbone (zigzag)
• Chevron (arrowhead)
• Parquet (geometric)
Each pattern creates distinct visual effects - diagonal layouts make rooms appear larger, while herringbone adds sophisticated movement. The right pattern selection transforms your vinyl flooring from purely functional to a true design element that enhances your entire space.
Straight Lay Pattern
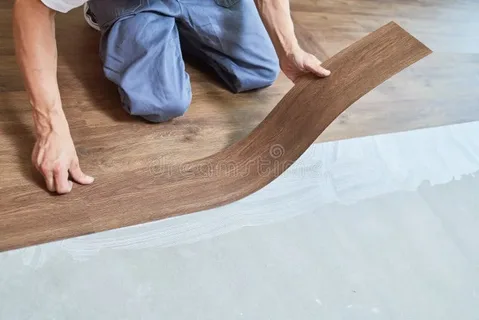
The straight lay pattern offers the most straightforward yet elegant installation approach for vinyl plank flooring. In this timeless layout, planks run parallel to your walls - typically following the room's longest dimension - creating a streamlined, cohesive appearance.
This versatile pattern delivers several advantages:
- Creates an illusion of length in narrow spaces
- Provides a clean, understated backdrop for any décor style
- Simplifies installation with minimal cutting requirements
- Works exceptionally well in both residential and commercial settings
Perfect for those seeking a fuss-free yet polished look, the straight lay method proves particularly effective in bedrooms, living rooms, and hallways where a sense of orderly flow is desired. For enhanced visual interest, consider aligning planks with the primary light source to emphasize the flooring's texture and minimize seam visibility.
Installation Tip: Maintain consistent 1/4" expansion gaps around the perimeter to accommodate natural material movement.
Diagonal Pattern

Break away from traditional layouts with the striking diagonal vinyl plank installation. By positioning planks at a 45-degree angle to your walls, this pattern creates:
Visual Expansion: The angular lines optically widen smaller rooms
Architectural Interest: Adds sophisticated movement to open floor plans
Design Flexibility: Complements both contemporary and transitional decors
This installation method works particularly well in:
• Entryways that benefit from dramatic first impressions
• Square rooms needing visual lengthening
• Open-concept areas requiring definition
While requiring more precise cutting than straight layouts, the diagonal pattern's transformative effect justifies the extra effort. For best results, begin installation from the room's center point and work outward to maintain symmetry.
Herringbone Pattern
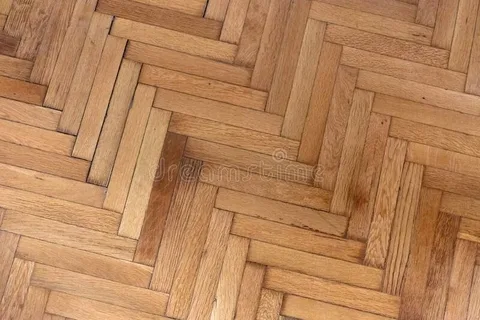
Elevate your space with the sophisticated herringbone pattern, a design staple that brings architectural distinction to vinyl plank installations. This intricate layout features planks arranged in precise 90-degree alternating directions, creating a continuous series of elegant V-shaped formations.
Why Choose Herringbone?
Design Prestige: Instantly upgrades standard vinyl to high-end appeal
Visual Texture: The dynamic zigzag adds depth and movement underfoot
Versatile Sophistication: Equally stunning in modern lofts and traditional homes
Ideal Applications:
• Grand entryways that make powerful first impressions
• Chef's kitchens where style meets functionality
• Formal dining areas that demand refined aesthetics
While requiring more precise cutting than basic patterns, herringbone's transformative power makes it worth the effort. For optimal impact, select planks with subtle grain variations to highlight the pattern's geometric precision.
Chevron Pattern

Make a bold design statement with the sharp angles of a chevron vinyl plank installation. This contemporary cousin to herringbone features planks cut at precise angles and aligned to create continuous, flowing zigzag lines that draw the eye through your space.
Key Characteristics:
Dynamic Visual Flow: Creates a sense of forward movement with its uninterrupted V formations
Architectural Edge: Brings a cutting-edge, designer look to minimalist spaces
Precision Craftsmanship: Requires exact 45-degree end cuts for seamless pattern alignment
Perfect For:
• Modern living rooms seeking a focal point
• Stylish home offices that inspire creativity
• Luxury bathrooms where details matter
The chevron pattern works particularly well with monochromatic or lightly textured vinyl planks, allowing the crisp geometric pattern to take center stage. While installation demands careful planning and precise cutting, the result delivers unparalleled sophistication.
Parquet Pattern

Transform your floors into works of art with parquet-style vinyl installations. These intricate geometric designs arrange planks in repeating mosaic formations - from classic basketweave to elaborate medallions - offering endless customization possibilities.
Design Advantages:
Architectural Grandeur: Elevates vinyl flooring to luxury status
Custom Complexity: Scale from subtle grid patterns to showstopping centerpieces
Dimensional Illusion: Creates fascinating light-play and movement underfoot
Ideal Settings:
• Formal entertaining areas deserving of a grand foundation
• Executive offices projecting refined professionalism
• High-end retail spaces requiring distinctive flooring character
Modern vinyl plank technology makes these historically wood-exclusive patterns accessible, with click-lock systems simplifying installation. For best results, select planks with uniform coloring to emphasize the geometric precision, or use subtle tonal variations to add depth.
Mixed Patterns
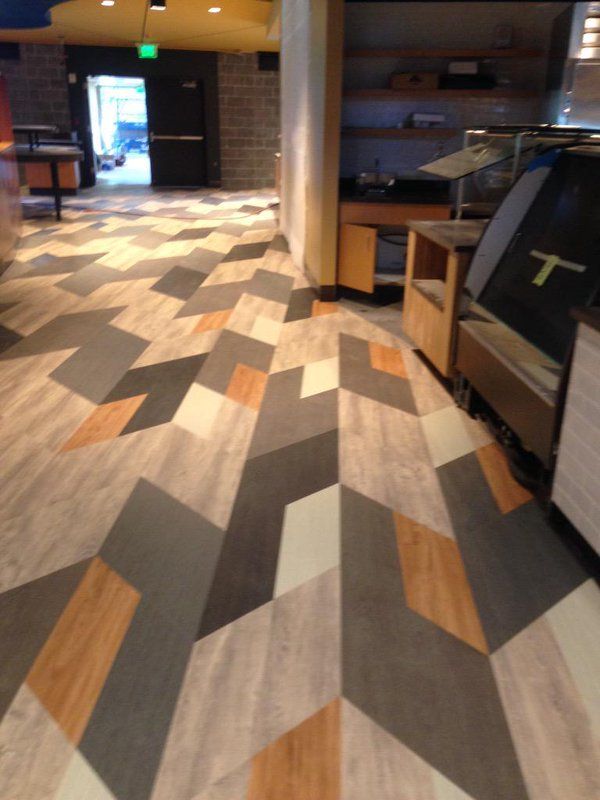
Break free from conventional layouts by artfully combining multiple vinyl plank installation patterns in a single space. This advanced design approach lets you craft truly bespoke floors that express your unique aesthetic vision.
Creative Possibilities:
Frame It: Use a herringbone or chevron border to elegantly contain straight-laid center sections
Zone Smart: Define different areas in open-concept spaces with distinct patterns
Color Play: Pair pattern mixing with tonal variations for added dimensionality
Signature Combinations:
• Classic straight-lay fields with geometric medallion accents
• Modern checkerboard centers bordered by diagonal planks
• Transitional spaces blending gradual pattern shifts
While requiring precise planning, these hybrid installations transform floors into conversation-starting design features. Always create detailed layout drawings first, and consider transitional thresholds where patterns meet.
Choose an Installation Method
Selecting the proper installation technique is crucial for achieving professional, long-lasting results with vinyl plank flooring. The three primary methods each offer distinct benefits tailored to different product types and project requirements:
1. Click-Lock (Floating) Installation
- Features interlocking plank edges that snap together
- Requires no adhesives, allowing for faster installation
- Ideal for DIYers and temporary installations
- Permits natural floor movement with temperature changes
2. Glue-Down Installation
- Provides the most permanent and stable result
- Recommended for high-traffic commercial spaces
- Creates seamless bond with subfloor
- Requires precise adhesive application
3. Peel-and-Stick (GripStrip) Installation
- Simplest method with pre-applied adhesive backing
- Allows for easy replacement of damaged planks
- Best for small to medium residential projects
- Requires perfectly smooth subfloor preparation
Key Consideration: Always verify your specific vinyl product's recommended installation method, as manufacturer warranties often depend on proper technique. The right choice balances your skill level, subfloor conditions, and long-term performance needs.
For optimal results, factor in room usage patterns, moisture levels, and whether you'll need future access to subfloors when selecting your installation approach.
GripStrip Method
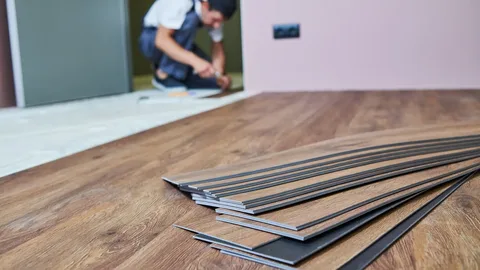
GripStrip (peel-and-stick) revolutionizes vinyl plank installation with its remarkably simple, glue-free application. This innovative system features planks with pre-applied adhesive backing - just peel, position, and press for instant bonding.
Why Choose GripStrip?
- Effortless Installation: No messy adhesives or special tools required
- Beginner-Friendly: Perfect for first-time flooring installers
- Adjustable Placement: Allows minor repositioning before final adhesion
-Clean Process: Eliminates wet adhesives and drying times
Best Applications:
• Thicker Luxury Vinyl Plank (LVP) products (typically 5mm-8mm)
• Residential spaces like bedrooms, home offices, and low-traffic areas
• Projects requiring quick installation with minimal disruption
Limitations to Note:
- Not recommended for thinner vinyl products (<4mm) or flexible LVT
- Requires impeccably clean, smooth subfloors for proper adhesion
- Less suitable for high-moisture areas unless using waterproof variants
Click-Lock Method
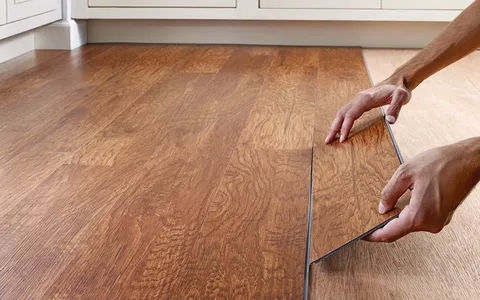
The Click-Lock (interlocking) system represents the gold standard for DIY-friendly vinyl flooring installation. This innovative tongue-and-groove mechanism allows planks to snap together precisely, creating a stable floating floor that adapts naturally to environmental changes.
Key Advantages:
- Tool-Free Assembly: No adhesives or fasteners required
- Built-In Flexibility: Accommodates seasonal expansion/contraction
- Universal Compatibility: Works with most LVP, LVT, and rigid core vinyl products
- Reversible: Allows for plank replacement if damaged
Critical Installation Tips:
1. Precision Alignment
- Audibly listen for the "click" confirming proper engagement
- Ensure all joints are fully seated before proceeding
2. Expansion Management
- Maintain consistent 1/4" perimeter gaps using spacers
- Bridge transitions with appropriate molding
3. Subfloor Preparation
- Must be clean, dry, and level (within 3/16" over 10 feet)
- Use underlayment only if specified by manufacturer
Professional Insight: For large areas, install in a staggered brick pattern (offset by at least 6 inches) to enhance stability and visual appeal. Always begin installation from multiple boxes simultaneously to ensure color variation.
This method combines professional-grade results with remarkable simplicity, making it ideal for everything from quick bedroom updates to whole-house renovations. The floating design also allows for installation over most existing hard surfaces, saving demo time and costs.
Glue-Down Method
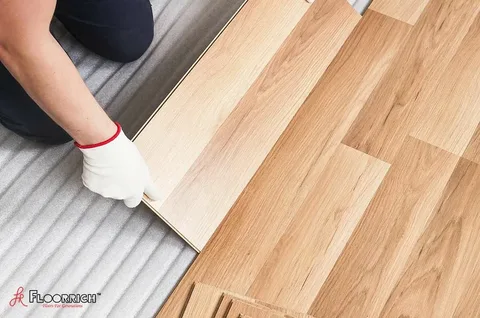
The glue-down method creates an exceptionally durable vinyl floor by permanently bonding planks directly to the subfloor. This professional-grade installation delivers superior performance where it matters most.
Why Choose Glue-Down?
Unmatched Stability: Eliminates movement and noise in high-traffic zones
Commercial-Grade Durability: Withstands heavy use in retail, offices, and healthcare
Moisture Defense: Creates a water-resistant barrier when using waterproof adhesive
Seamless Appearance: Minimizes visible edges for a unified surface
Professional Installation Protocol
Adhesive Selection
Use manufacturer-approved pressure-sensitive or reactive adhesives
Match adhesive type to your specific vinyl product
Precision Application
Trowel adhesive evenly in manageable 3'x3' sections
Maintain proper open time before plank placement
Secure Bonding
Use a 100lb floor roller within 30 minutes of installation
Pay special attention to edges and seams
Curing Process
Allow 24-72 hours before subjecting to full use
Maintain stable room temperature during curing
Lay the First Row
Trim off the Short Tongue Edge of the First Plank
Begin your vinyl plank installation by modifying the starter plank for a perfect wall fit:
Precision Modification
Carefully remove the short tongue side (typically the end groove) using a sharp utility knife
Make multiple light scoring passes rather than one deep cut for cleaner edges
Proper Placement
Position the modified edge flush against your starter wall
Verify a consistent 1/4" expansion gap using spacers
Starter Row Tips
Always cut from the backside of the plank for cleaner edges
Use a straightedge guide for absolute cutting precision
Save the cut-off tongue section - it may be useful for later rows
Lay the First Plank About 1⁄4 Inch from the Wall
Begin your vinyl flooring installation with precision by following these key steps:
Establish Expansion Space
Position the first plank with a consistent 1/4" gap from all walls
This critical spacing accommodates natural material movement
Use Spacing Tools
Insert plastic spacers every 12-18 inches along the starting wall
Maintain spacers until baseboard installation
Alignment Check
Verify the plank runs perfectly parallel to your starting wall
Use a measuring tape to confirm equal gap distance at both ends
Special Considerations
In rooms with uneven walls, trace and cut planks to follow contours
For floating floors, ensure the groove side faces outward
Use Spacers Along the Walls to Allow for Expansion
To ensure a professional, long-lasting installation:
Strategic Spacer Placement
Position spacers every 12-18 inches along all walls
Use double spacers in corners for consistent gap maintenance
Gap Protection Benefits
Prevents buckling from seasonal expansion
Allows for natural material movement
Maintains structural integrity of the flooring system
Installation Best Practices
Keep spacers in place until all planks are installed
Verify gap consistency with a quick visual check every few rows
Remove spacers only when ready to install baseboards or transition moldings
Stagger the End Joints of the Planks in Each Row by at Least 6 Inches
Achieve both structural integrity and visual appeal with proper staggering technique:
The 6-Inch Rule
Offset adjacent row seams by a minimum of 6 inches
Ideal stagger creates a pleasing brick-like pattern
Structural Benefits
Distributes weight evenly across the floor
Prevents seam alignment that can weaken the installation
Reduces visible patterning for a more authentic look
Pro Installation Methods
Start alternate rows with cut planks from previous rows
Maintain a 12-inch minimum distance between seams in any three consecutive rows
For visual randomness, vary stagger distances between 6-12 inches
Cutting Planks to Fit
Use a Utility Knife to Score and Snap Planks
Master clean, accurate cuts with these professional methods:
Scoring & Snapping Method
Mark cut lines clearly using a carpenter's square for perfect angles
Score deeply along the front face with 3-4 firm knife passes
Bend downward sharply to snap along the scored line
Cutting Best Practices
Always cut from the finished side outward for clean edges
Support planks evenly on both sides when snapping
Use a straightedge guide for complex angled cuts
Special Situation Solutions
For intricate cuts: Make relief cuts before final shaping
Tight spaces: Rotate plank upside down for better scoring control
Thick planks: Score both sides before snapping
For Irregular Cuts
When tackling intricate vinyl plank cuts around obstacles, professional installers rely on these power tool techniques:
Tool Selection Guide
Jigsaw: Ideal for sweeping curves and large cutouts
Oscillating Multi-Tool: Perfect for tight notches and flush cuts
Rotary Tool: Best for precision detail work
Pro Cutting Techniques
Use fine-tooth blades (60+ TPI) for clean, splinter-free edges
Cut with the finished side facing up to prevent surface damage
Secure planks firmly with clamps before cutting
Special Application Tips
Door Jambs: Under-cut with oscillating tool for seamless tucks
Pipes: Drill starter holes before jigsaw cutouts
Radiators: Create custom templates from cardboard first
Cutting Planks Around Pipes
Follow this precise method for flawless plumbing penetrations:
Measurement Protocol
Determine pipe outer diameter (OD) with calipers
Add 1" to diameter for proper clearance
Mark center point on plank using a carpenter's square
Cutting Process
Drill starter hole using spade bit (sized to pipe OD + 1")
Make radial relief cuts from hole edge to plank edge
Test fit before final installation
Installation Best Practices
Maintain ½" expansion gap around entire pipe circumference
Apply 100% silicone caulk to:
• Back of plank cutout
• Pipe base flangeWeight cutout piece during 24-hour cure time
For Tight Spaces Like Under Door Jambs
For seamless transitions around door casings, professional installers use these methods:
Jamb Saw Fundamentals
Set blade depth to match vinyl plank thickness plus underlayment
Make plunge cuts at 45° angles for perfect clearance
Work slowly to prevent tear-out on finished surfaces
Alternative Approaches
For DIYers without specialty tools:Use an oscillating multi-tool with flush-cut blade
Employ a handsaw with flexible blade for tight spaces
Create cardboard templates for complex profiles
Installation Best Practices
Undercut jambs 1/8" higher than flooring thickness
Test fit planks before final placement
Apply silicone sealant to hidden edges for moisture protection
Laying Subsequent Rows
Angle the Tongue of the Plank into the Groove of the Previous Row
Master the proper method for connecting vinyl plank rows with this step-by-step guide:
Precision Alignment Process
Hold new plank at a 30-45° angle to installed row
Align tongue precisely with groove along entire length
Maintain even pressure during engagement
Secure Locking Method
Lower plank smoothly while maintaining forward pressure
Listen for audible "click" confirming proper engagement
Verify seam tightness visually and by touch
Troubleshooting Tips
If plank won't lock: Check for debris in groove
For stubborn connections: Use tapping block and mallet
Never force perpendicularly - always maintain proper angle
Use a Tapping Block and Non-Marring Hammer
For flawless plank connections without damage:
Tool Selection
Use a urethane tapping block (softer than vinyl)
Choose a rubber mallet with 16-24 oz head weight
Keep a pull bar handy for wall-side installations
Proper Tapping Method
Place block against plank's grooved edge
Strike with firm, controlled taps at 45° angle
Alternate strikes between ends and center
Damage Prevention
Never strike planks directly
Check for proper alignment before tapping
Stop immediately if resistance increases
Finishing the Installation
Install Transition Strips
Complete your vinyl flooring project with polished transitions using these expert techniques:
Strategic Placement
Install at all doorway thresholds
Use between different flooring types
Place where flooring changes direction
Proper Installation Method
Select appropriate profile: T-molding, reducer, or threshold
Secure to subfloor only - never fasten through vinyl planks
Maintain consistent 1/4" expansion gaps on both sides
Finishing Touches
Use color-matched transition pieces
Apply silicone adhesive in high-moisture areas
Test for secure fit and smooth transition
Transitioning to Other Flooring
Elevate your installation with proper transition methods between different flooring surfaces:
Transition Strip Selection Guide
T-Molding: Ideal for same-height surfaces (e.g., vinyl to tile)
Reducer Strip: Perfect for height variations (e.g., vinyl to carpet)
Threshold: Best for exterior doorways
Professional Installation Protocol
Secure track or strip directly to subfloor using appropriate fasteners
Never penetrate vinyl planks with fasteners
Use construction adhesive for solid subfloors
Critical Expansion Management
Maintain consistent 1/4" gap on vinyl side
Verify parallel alignment with laser level
Allow 24-hour cure time before heavy traffic
Reinstall Baseboards
Complete your vinyl flooring project with proper trim installation using these expert methods:
Critical Installation Principles
Fasten baseboards to wall studs only (never to flooring)
Maintain 1/8" clearance above flooring surface
Use 2-1/2" finish nails for optimal hold
Proper Technique
Pre-drill nail holes to prevent splitting
Install with slight downward pressure to maintain gap
Use shims behind baseboard for straight alignment
Finishing Touches
Fill nail holes with color-matched putty
Apply paintable caulk along top edge
Touch up with matching paint or stain
Allow the Floor to Acclimate for 48 Hours Before Use
To ensure optimal performance and longevity of your new vinyl flooring:
Critical Rest Period
Maintain a 48-hour minimum acclimation period
Restrict all foot traffic and furniture placement
Keep room temperature consistent (65-85°F)
Environmental Controls
Maintain relative humidity between 35-65%
Avoid direct sunlight exposure during curing
Keep HVAC system running normally
Phased Use Recommendations
After 48 hours: Light foot traffic permitted
After 72 hours: Furniture may be placed (use protective pads)
After 7 days: Full regular use
Summary of Vinyl Flooring Installation Steps:
Step 1: Prepare the Surface
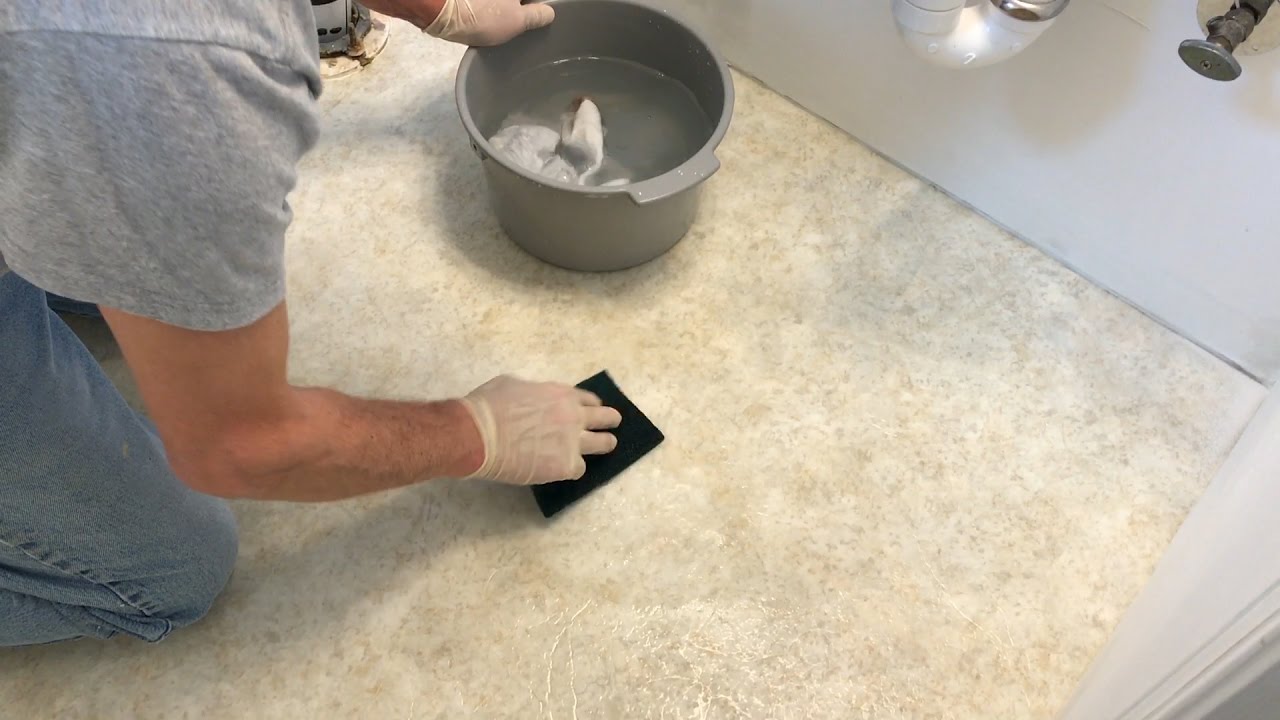
Complete your installation with professional-grade cleaning for optimal results:
Two-Stage Cleaning Process
Begin with dry cleaning:
Use a microfiber dust mop to capture fine particles
Vacuum with soft brush attachment for thorough debris removalFollow with wet cleaning:
Damp mop using pH-neutral vinyl floor cleaner
Change rinse water frequently to prevent streaking
Critical Drying Phase
Allow 2-4 hours drying time before final inspection
Use floor fans in high-humidity environments
Verify dryness with the "plastic sheet test" (no condensation after 1 hour)
Adhesion Readiness Check
Perform moisture test:
Tape 12" plastic square to floor for 24 hours
Reject if moisture droplets form underneathSurface must be completely dust-free
Step 2: Position the First Row
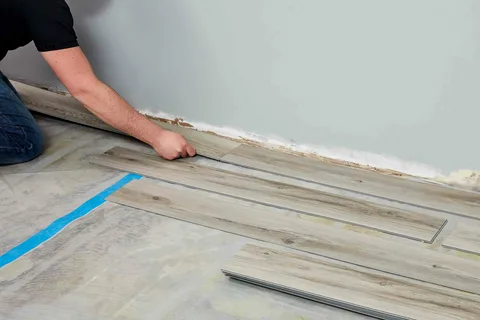
Establish your foundation for a flawless installation with these professional techniques:
Layout Marking Protocol
Snap chalk lines parallel to your reference wall
Double-check measurements at multiple points
Use laser level for perfect alignment
Spacer Placement Strategy
Position spacers every 12" along starting wall
Add corner spacers at 45° angles
Verify consistent 1/4" gap with feeler gauge
First Plank Installation
Orient groove side toward starting wall
Check alignment with 6' straightedge
Confirm squareness using 3-4-5 triangle method
Step 3: Apply the Planks
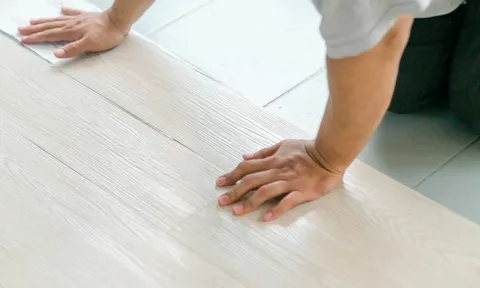
First Row
Execute a flawless starting row with this precision method:
Initial Plank Preparation
Remove the short tongue edge using a sharp utility knife
Make multiple shallow scoring passes for a clean break
Smooth cut edge with 120-grit sandpaper
Precision Placement
Position modified plank 1/4" from wall with groove facing outward
Verify parallel alignment using laser level
Check gap consistency at both ends
Row Installation Protocol
Install wedge spacers every 8-12" along wall
Use tapping block only on grooved edge
Confirm straightness every 3-4 planks
Subsequent Rows
Master the seamless connection of vinyl planks with this precise method:
Proper Engagement Process
Insert new plank at a 30-45° angle
Align tongue perfectly with preceding row's groove
Apply even downward pressure while lowering
Secure Connection Method
Listen for distinct "click" confirmation
Visually inspect seam for consistent tightness
Run fingertips along joint to detect imperfections
Finishing Technique
Use urethane tapping block on grooved edge only
Strike with 16oz rubber mallet at 45° angle
Apply firm, controlled taps (never brute force)
Step 4: Cutting Planks to Fit
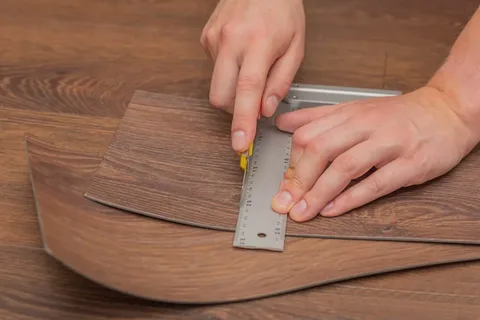
Achieve professional results with these cutting methods:
Measurement & Marking Protocol
Use a contour gauge for irregular obstacles
Mark cut lines with a fine-tip painter's tape
Double-check measurements before cutting
Straight Cut Technique
Score deeply along marked line (3-5 passes)
Bend plank downward over straight edge
Smooth rough edges with 220-grit sandpaper
Complex Cut Solutions
Jigsaw with 80 TPI fine-tooth blade
Cut with finished side up to prevent chipping
Support plank on foam padding during cutting
Step 5: Final Adjustments and Trimming

Complete your vinyl flooring project with professional finishing touches:
Adhesion Verification
Systematically inspect entire floor using a 100lb roller
Pay special attention to edges and transitions
Reactivate glue with heat gun if needed (glue-down installations)
Precision Trimming
Use a fresh utility knife blade for clean cuts
Trim protruding edges at 45° angles
Smooth cut edges with fine-grit sanding block
Spacer Removal Protocol
Extract spacers using needle-nose pliers
Inspect gaps for consistent 1/4" clearance
Vacuum expansion channels before baseboard installation
Common Things to Avoid
Areas with Excessive Moisture
While vinyl plank flooring offers water resistance, it's not ideal for high-moisture environments due to these critical factors:
Vulnerability Points
Seam penetration: Water can infiltrate between planks
Subfloor damage: Persistent moisture promotes mold growth
Adhesive breakdown: Humidity compromises glue-down installations
Problem Areas to Avoid
Full bathrooms (shower areas especially)
Saunas or steam rooms
Laundry rooms with floor drains
Below-grade installations with moisture issues
Alternative Solutions
For wet areas: Consider sheet vinyl or ceramic tile
In damp spaces: Use WPC or SPC rigid core products
Always install proper vapor barriers
Using a Rubber Mallet or Hammer Directly on the Planks
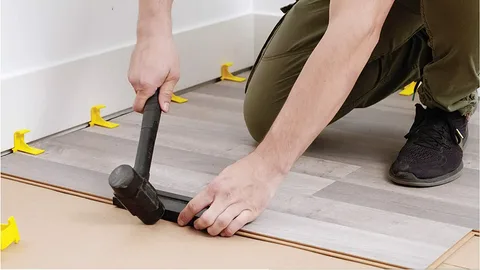
To ensure damage-free installation while securing tight seams, follow these professional guidelines:
Impact Protection Protocol
Always place a urethane tapping block against plank edges
Use only rubber-faced mallets (16-24 oz)
Strike at 45-degree angles for even pressure distribution
Tool Selection Guide
For click-lock systems:Non-marring nylon tapping blocks
Pull bars for wall-adjacent planks
For glue-down installations:100lb floor roller for adhesion
Silicone-faced beat-on blocks
Damage Prevention Techniques
Never strike plank surfaces directly
Check block positioning before each tap
Stop immediately if material begins to compress
Don't Overlap the End Joints of the Planks in Adjacent Rows
Proper joint spacing is critical for both structural integrity and visual appeal in vinyl plank installations. Follow these guidelines for optimal results:
Staggering Requirements
Maintain minimum 6" offset between adjacent row joints
Follow the "rule of thirds" for large areas (stagger at 1/3 and 2/3 points)
Never allow seams to align in an "H" or "step" pattern
Structural Benefits
Distributes weight evenly across the subfloor
Prevents stress concentration at seam locations
Maintains dimensional stability during expansion/contraction
Installation Best Practices
Start each row with cut-off piece from previous row
Use a random stagger pattern for natural appearance
Maintain consistent 8-10" minimum spacing between joints in any three consecutive rows
Walking on the Floor During the Acclimation Period
To ensure optimal performance and longevity, strictly observe these guidelines during the 48-hour acclimation period:
Complete Floor Restriction
Prohibit all foot traffic and furniture placement
Use barrier signage or tape to prevent accidental access
Plan installation timing to accommodate the waiting period
Environmental Stabilization
Maintain consistent room temperature (65-85°F)
Keep relative humidity at 35-65%
Ensure HVAC systems operate normally
Post-Acclimation Transition
After 48 hours: Permit light foot traffic with soft-soled shoes
After 72 hours: Gradually introduce furniture (use protective pads)
After 7 days: Resume normal use
Tips for a Successful Installation
Follow these essential steps to ensure a flawless flooring project from start to finish:
Precise Material Calculation
Measure room dimensions at multiple points (account for irregularities)
Use flooring calculator formulas:
(Length × Width) ÷ Coverage + 10% waste factorPurchase all boxes from same production lot for color consistency
Quality Control Protocol
Inspect planks under bright light for:
• Surface defects
• Warping or cupping
• Color inconsistenciesSet aside 5% extra as repair inventory
Ergonomic Installation Setup
Use gel-filled knee pads with hard caps
Maintain proper posture (90° knee angle)
Schedule regular stretch breaks every 45 minutes
Professional Work Pace
Allow 3-4 hours per 100 sq ft for precision work
Dry-fit complex cuts before final placement
Verify alignment every 3-4 rows
Frequently Asked Questions
How long does a vinyl flooring project take?
The typical duration for a quality vinyl plank flooring installation varies based on these key factors:
Project Scope Considerations
100-300 sq ft: 1 day (prep to completion)
300-800 sq ft: 1-2 days
800+ sq ft: 2-3 days
Time Allocation Breakdown
Subfloor preparation: 15-25% of total time
Acclimation period: 48 mandatory hours (not labor time)
Active installation: 4-6 hours per 100 sq ft
Finishing work: 1-2 hours per room
Variables Affecting Duration
Complexity Factors:
• Pattern designs (herringbone adds 30-50% time)
• Obstacle density (each pipe/cabinet adds 15-30 mins)Preparation Requirements:
• Subfloor leveling adds 4-8 hours
• Existing floor removal adds 2-4 hours
Do you need to put anything under vinyl plank flooring?
While not universally mandatory, underlayment offers significant benefits in specific installations:
Strategic Applications
Essential for:
• Concrete subfloors (moisture barrier required)
• Multi-story constructions (impact noise reduction)
• Commercial spaces (enhanced durability)Optional for:
• Most residential ground-level installations
• Floating floors with attached underlayment
Performance Advantages
3-5dB noise reduction (STC rating improvement)
Up to 30% better impact absorption
Thermal insulation (R-value up to 0.5)
Selection Guidelines
Maximum thickness: 2mm (unless manufacturer-approved)
Required properties:
• Vapor barrier (≥6 mil for concrete)
• Non-fiberglass composition
• Proper compressive strength
Is it better to glue or float vinyl plank flooring?
Glue-Down Method:
Best for: High-traffic commercial spaces, moisture-prone areas, and permanent installations
Advantages:
✓ Creates an immovable, monolithic surface
✓ Eliminates hollow sound underfoot
✓ Withstands rolling loads (carts, equipment)
✓ Superior moisture protection when using waterproof adhesive
Floating Method:
Best for: Residential DIY projects, temporary installations, and uneven subfloors
Advantages:
✓ No curing time - immediate use
✓ Accommodates subfloor imperfections
✓ Allows for future repairs/replacement
✓ Permits natural thermal expansion
Key Considerations:
Climate: Floating preferred in areas with significant humidity swings
Subfloor: Glue-down requires perfectly smooth surfaces
Warranty: Some manufacturers specify preferred method
Cost: Glue-down typically adds 15-20% to project budget
Professional Insight: Hybrid approach possible - glue perimeter with floating field for commercial applications requiring both stability and expansion capability. Always consult flooring specifications - some rigid core products perform better as floating floors despite commercial use.
Conclusion
Transform your space with vinyl plank flooring – a perfect DIY project that delivers professional-looking results. Whether you're a first-time installer or a seasoned DIYer, our comprehensive guide makes it easy to create flawless floors that will last for years.
Why Choose DIY Vinyl Plank Flooring?
✓ Forgiving installation process perfect for beginners
✓ No special tools required for most installations
✓ Immediate satisfaction of visible progress
Pro Tips for Success:
Work in small sections for better control
Double-check measurements before cutting
Celebrate each completed section
Need a helping hand? While this is an achievable DIY project, our team of flooring experts is ready to assist with professional installation services for those who prefer it done perfectly the first time. Contact us for a free consultation and quote.
Enjoy the pride of a job well done – and floors that look like they were installed by professionals! Remember: Beautiful floors begin with proper preparation and patience.

